In the realm of home maintenance, the replacement of a garage door spring stands as a task that, while seemingly daunting, can be undertaken by the determined homeowner armed with the right knowledge and tools.
The task requires an understanding of the two primary types of springs used in garage doors: torsion springs and extension springs. Each type has a different mechanism of operation and, thus, requires a specific set of procedures for safe and effective replacement.
This discussion will provide a comprehensive guide to DIY garage door spring replacement, equipping you with the necessary know-how to tackle this project with the confidence and proficiency of a professional.
Embarking on this journey, you may find that not only can you save substantial costs associated with professional repair services, but you can also enrich your technical skill set and self-reliance.
Understanding Garage Door Spring Types
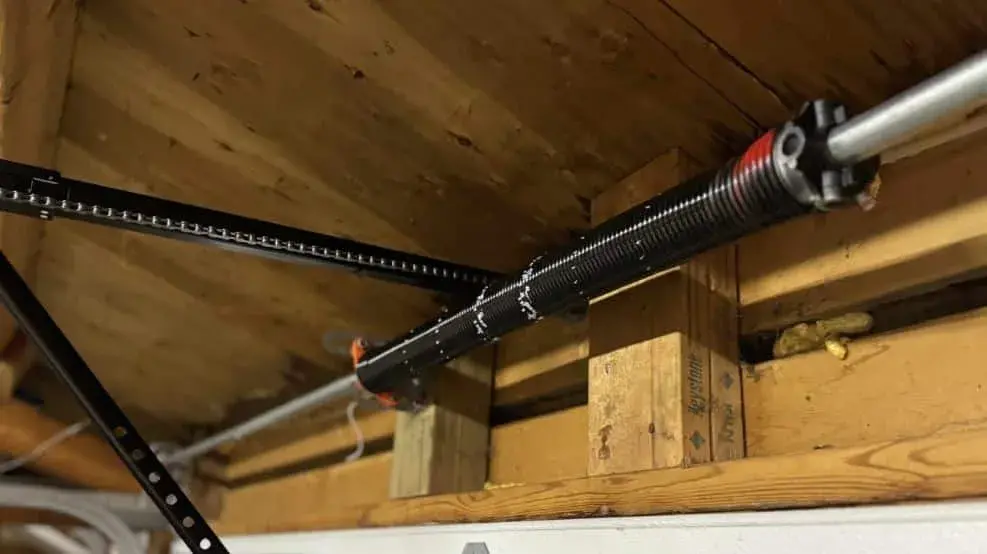
Diving into the realm of garage door springs, it’s crucial to comprehend that there are primarily two types: torsion springs and extension springs, each with unique attributes and functions.
Torsion springs, mounted horizontally above the door opening, work by twisting, or torsion. As the door closes, cables attached to the bottom corners cause the springs to wind up, creating stored energy. When the door is opened, this energy is released, helping to lift the door.
Conversely, extension springs, situated on either side of the door track, expand and contract as the door operates. The system is designed in such a way that when the door is down, the springs are stretched out, storing energy, which is then used to help lift the door when it’s opened.
Step-by-Step Spring Replacement Guide
Having comprehended the types and functions of garage door springs, we can now proceed to the practical aspect of this discussion – a detailed step-by-step guide on how to replace these crucial components.
Disconnect Power: Unplug the garage door opener and disengage it. Safety first!
Secure the Door: Prevent the garage door from moving by securing it with a C-clamp or locking pliers.
Remove the Old Spring: Loosen the set screws on the broken spring and slide it off the torsion tube.
Install the New Spring: Slide the new spring onto the tube, secure it with the set screws and wind it up.
Reconnect Power: Re-engage and plug in the garage door opener.
Performing these steps correctly ensures a successful, safe spring replacement process.